


A light switch is a small part of a room, but one you see and touch every day. Its position, finish and feel deserve the same consideration as a cabinet handle or a door lever. With Buster + Punch Custom Electricity, you can bring those details together while choosing the functions you need in each location.
The modular concept combines a wall plate, functional modules and finishing details. At Bødker &, our switch and socket configurator helps you explore the composition and build a list of the individual components to order.
What is Custom Electricity?
A pre-selected switch or socket gives you a defined combination of functions and finishes. Custom Electricity lets you compose that combination yourself: choose the plate, decide what each position should do, and select the details that complete the design.
You might want two lighting controls beside a doorway, or a dimmer and a socket together beside a reading chair. The aim is to plan around the way you use the space, then give the different combinations a consistent visual identity.
Start with the functions
Before choosing a finish, consider what you need at each location. Which lights should be controlled together? Where will you charge a phone? Which socket type does the installation require? A simple room-by-room list makes these decisions easier.
Our configurator includes toggle switches, dimmers, sockets, USB charging and data modules, alongside blank options. The electrical function of a module matters as much as its appearance: switches that look similar can operate differently. Confirm the required switch type, dimmer specification and socket type with your electrician before ordering.
Choose a plate with room for your combination
In our configurator, you can choose plates from 1G to 4G. The number describes the number of module positions: 1G has one position, while 4G has four. It does not necessarily describe the number of lighting circuits or devices controlled.
Where offered, you can also choose a horizontal or vertical arrangement. Consider the surrounding wall space, nearby door frames and how the controls will be reached. Check the plate dimensions and the mounting requirements before settling on the layout; the visible plate size alone does not establish compatibility with an existing wall box.
Combine finishes and details
The plate creates the background, while the controls and details provide contrast or continuity. Our configurator offers plate finishes including Brass, Steel, Smoked Bronze, Black and White. A dark plate with brass details creates a different expression from a steel plate with matching details.
Think about these choices alongside the other elements in the room. Repeating a metal finish across electrical details, door hardware and cabinetry can create a visual connection without making every surface identical. Alternatively, use the plate to relate to the wall and let the controls stand out.
Cross or Linear?
Cross and Linear offer different expressions in the textured metal details. Cross has the recognisable crossed pattern; Linear uses parallel lines. Choose the look that best relates to the handles, lighting and other details in your project, and compare real product photographs before deciding.
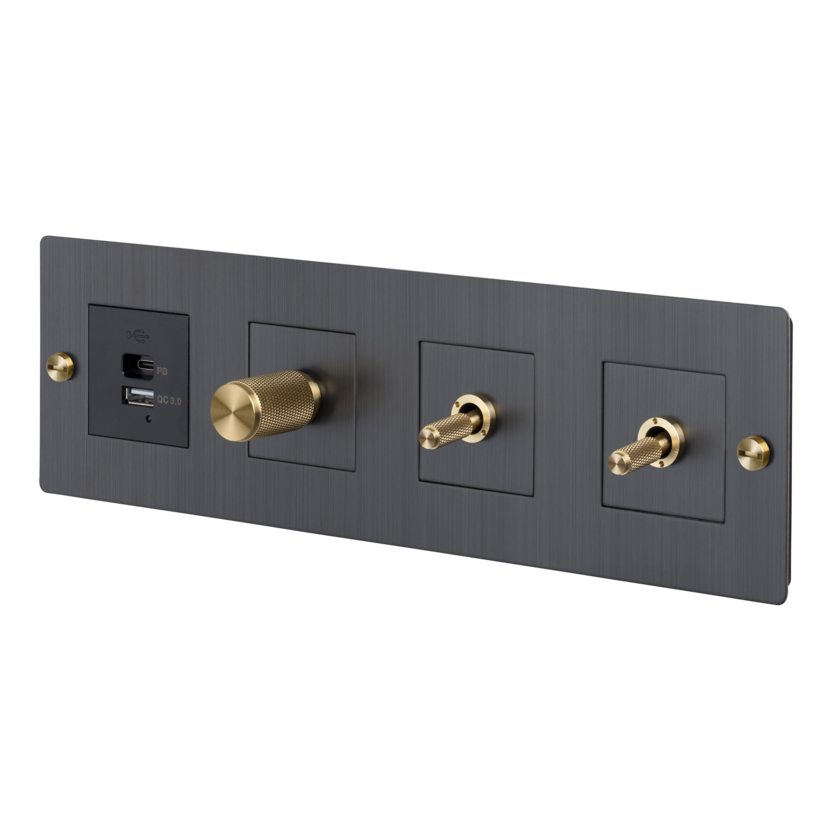
Three ways to plan a composition
At the entrance to a room
Start by listing the lighting groups you want to control as you enter. More than one control on a shared plate can make the arrangement easier to understand. Decide the order of the controls before ordering, so it follows how you use the room.
Beside a sofa or reading chair
Consider a dimmer for a compatible lighting circuit alongside a socket for a reading lamp or another device. Keep the functions within reach and decide whether the plate should blend into the wall or become a visible detail. Your electrician should confirm how the proposed controls relate to the actual wiring and lighting.
Beside the bed
Lighting control and charging are often useful together. Plan both sides of the bed at the same time: matching finishes can give a coherent result even when the order of the modules differs from one side to the other.
How to use our configurator
- Choose the plate size and arrangement.
- Select the plate finish and the Cross or Linear look.
- Choose the function and available options for each position.
- Review the illustration and component list.
- Select how many identical sets you need and add the components to your cart.
The illustration helps you compare the composition and colours. It is not a product photograph or an installation drawing, and screen colours may differ from the actual finishes. Use the product photographs to assess the details and the manufacturer's documentation for technical planning.
Try the Buster + Punch Custom Electricity configurator.
What is included, and how is the price calculated?
The configuration price is the sum of its individual components. The component list shows the plate, modules and relevant detail kits for your selection. Screw caps are included in the plate detail kit. Back boxes are not included in the configuration.
If you select two identical sets, the quantity of each component is multiplied accordingly. The cart contains the individual parts, identified by their configuration; it is not a single assembled product. Review the quantities before checking out, especially if you adjust individual lines in the cart.
Current prices and availability are checked when you transfer the configuration to the cart. If the quoted price has changed, you are asked to confirm it before the items are added.
Before you order
Share the proposed component list with your electrician. Confirm the mounting box, space requirements, wiring, switch functions, socket type and any dimmer compatibility with the intended lights. For special locations, such as wet areas, confirm that the selected products and their placement are appropriate. A combination that looks right in the illustration is not, by itself, a technical installation approval.
Choose your next step
If you already know the functions you need, create your own switch and socket configuration. If you prefer a pre-selected combination, explore our switches and sockets.
For help coordinating the electrical details with the wider interior, explore our showroom and meeting options. We can discuss finishes, composition and how the details relate to the rest of your project.


